
In modern backgammon, games rarely come down to a simple running contest. While beginners often sprint their back checkers toward safety as soon as the dice allow, experienced tournament competitors understand that controlling territory is far more reliable than racing. Among all competitive strategies, the priming game represents the purest expression of board control.
A priming game revolves around containment. Instead of scattering checkers or chasing reckless hits, a player methodically captures a chain of adjacent points across the board. When linked together, these points establish an impassable wall called a prime. Trapped behind this barrier, an opponent’s checkers are frozen in place, forced to waste pips and shuffle harmlessly while the priming player calmly marches their remaining army home.
Understanding the geometry, mathematics, and tactical execution of priming is one of the clearest dividing lines between casual play and competitive mastery. Whether you are learning fundamental backgammon strategy or seeking to improve your match win rate, mastering the art of the blockade transforms how you view every turn of the dice.
What is a prime in backgammon?
In the rules of backgammon, a point is considered secured or “made” whenever a player places two or more of their own checkers upon it[1]. Opposing checkers cannot land on a secured point, nor can they touch down upon it while executing individual die segments of a roll.
A prime is defined as an unbroken sequence of consecutive made points[1]. Even a modest mini-prime spanning 3 or 4 points creates a formidable obstacle[2]. When an opponent lands behind a 4-point prime, their natural jumping avenues narrow drastically. But as a player extends their blockade into a 5-point prime and ultimately caps it as a full 6-point prime, the nature of the game changes from a competitive race into total positional containment[2].
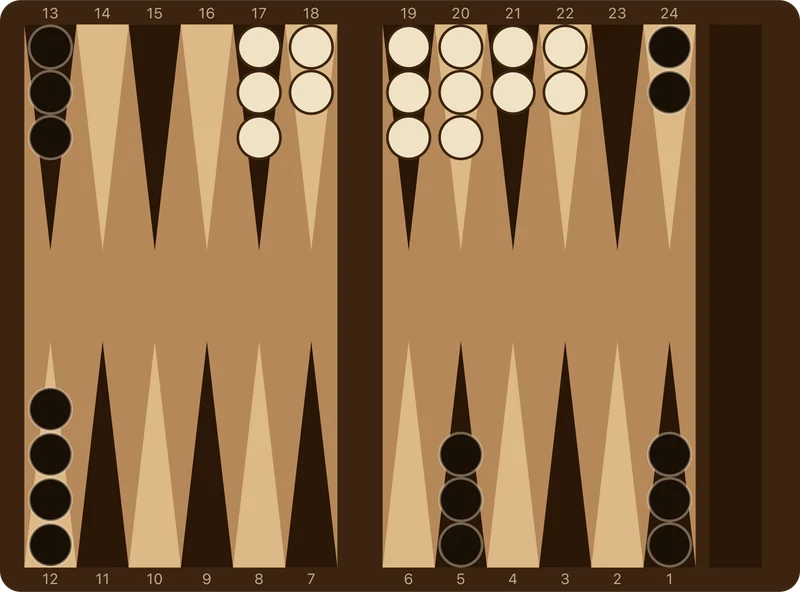
The strategic strength of a prime lies in its unbroken density. If you hold three separated points—such as the 8-point, the 6-point, and the 4-point—the opponent can slip through the gaps with relatively small dice numbers. However, when those same points are connected into a solid cluster, the opponent faces a brick wall. Every checker trapped behind that structure is paralyzed until a gap opens or until an extraordinary roll clears the barrier.
Why is a full six-point prime an impenetrable wall?
The defining mathematical reality of backgammon is that a standard die has six faces, numbered from 1 to 6. Because no single die roll can exceed 6, a full six-point prime is completely impassable[1].
Consider the position illustrated above. White has successfully connected six consecutive points, spanning from point 3 through point 8. Two of Black’s checkers sit trapped deep on White’s 1-point[2].
If Black attempts to move a trapped checker from point 1, examine what happens across every possible die value:
- A roll of 1 moves the checker to point 2. Point 2 may be open, but once on point 2, the checker remains trapped behind White’s wall. To leap from point 2 past point 8 requires traveling a distance of 7 pips, which cannot be achieved in a single leap.
- A roll of 2 lands on point 3, which is blocked by White.
- A roll of 3 lands on point 4, which is blocked by White.
- A roll of 4 lands on point 5, which is blocked by White.
- A roll of 5 lands on point 6, which is blocked by White.
- A roll of 6 lands on point 7, which is blocked by White.
Even if Black rolls double sixes—the largest possible roll on two dice—neither checker can move[3]. Under backgammon movement rules, a multi-dice roll cannot be combined into a single superhuman jump of 12 pips; each checker must execute its moves in individual increments corresponding to the faces of the dice. Because every intermediate landing point from distance 2 through distance 6 is occupied by two or more white stones, Black has zero legal moves for those trapped checkers.
Until White chooses to dismantle or shift a point in the prime, Black’s back checkers are prisoners. This absolute paralysis gives the priming player freedom to roll safely, position builders, and prepare an orderly bear-in.
How do you escape from an opponent’s prime?
Being trapped behind an enemy prime is one of the most dangerous positions in backgammon. Every turn spent stuck behind a growing blockade increases the risk of being gammoned or forced into destructive moves elsewhere on the board.
To escape from an enemy blockade, tournament players rely on a classic tactical guideline known as the edge-of-the-prime rule[4].
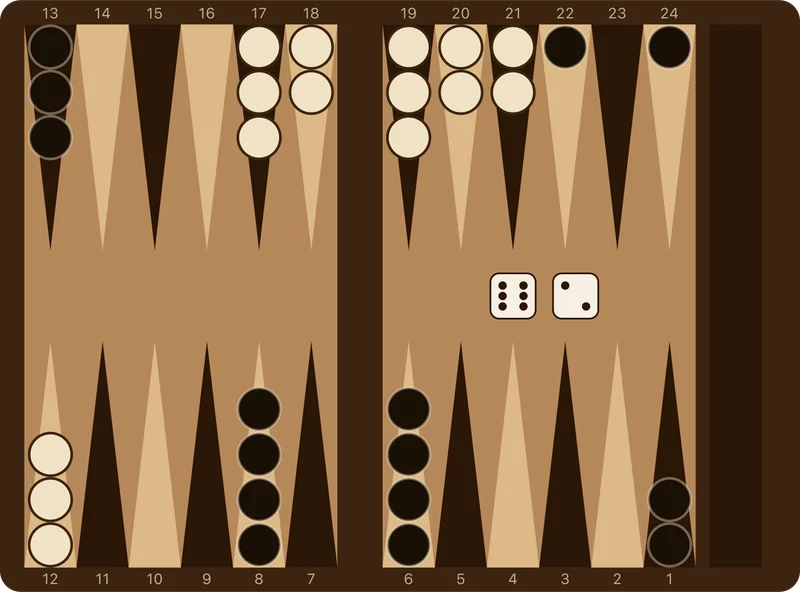
The rule states: whenever an opponent begins building a prime, your highest priority must be advancing your trapped checkers directly to the foot or edge of the blockade[4].
In the diagram above, White holds a formidable 5-point prime spanning from point 4 through point 8. Black has two back checkers. One checker lingers behind on point 1, while the other has successfully stepped up to the edge of the prime at point 3[2].
Look at the difference in escape potential between these two checkers:
- From point 1, Black cannot escape on any single die roll. A roll of 6 reaches only point 7, which is firmly held by White. Reaching safety at point 9 would require a distance of 8 pips, which cannot be rolled on a single die.
- From point 3, however, the geometry shifts entirely. The distance from point 3 to the first open point beyond the prime (point 9) is exactly 6 pips (9 minus 3 equals 6)[2].
Because 6 is a standard number on a six-sided die, any roll featuring a 6 allows the checker on point 3 to vault directly over White’s entire five-point wall and land on open territory[4].
The exact probability of rolling a six
How likely are you to roll a 6 when sitting on the edge of a five-point prime?
When rolling two fair dice, there are exactly 36 possible outcomes[5]. To calculate the probability of escaping, we count how many of those 36 rolls contain at least one 6:
- Rolls where the first die is a 6: (6-1, 6-2, 6-3, 6-4, 6-5, 6-6) = 6 rolls.
- Rolls where the second die is a 6: (1-6, 2-6, 3-6, 4-6, 5-6) = 5 rolls (excluding 6-6, which is already counted).
Summing these combinations yields exactly 11 rolls out of 36 that feature at least one 6[5]. Dividing 11 by 36 reveals an escape probability of approximately 30.6%, or roughly 31%[2].
Sitting on the edge of a 5-prime gives you nearly a one-in-three chance to break free on your very next turn[2]. If you fail to advance to the edge and remain trapped deeper on point 1 or point 2, your chances of leaping over the blockade in a single roll drop to zero. That single step forward transforms an impossible trap into a realistic escape.
How do you build and extend your own prime?
Building a championship-caliber prime requires patience, tactical discipline, and active checker coordination. You cannot simply hope that favorable doubles land on the exact points you need; you must create the structural conditions that make completing a prime inevitable.
Expert players follow three core principles when constructing a prime:
1. Mobilize builders from key outposts
Checkers cannot make points out of thin air. To build points across your outer and home board, you must distribute spare checkers—known as builders—onto vantage points where their direct rolls aim at target points[2].
Your primary source of early builders is the 13-point midpoint[2]. At the start of a match, you hold five checkers on the 13-point. Stripping two of those spare checkers and bringing them down into your outer board (such as the 11-point, 10-point, or 9-point) establishes a crossfire of numbers aimed directly at your bar-point (point 7) and your home board points. Combined with spare checkers resting on your 8-point, these active builders give you dozens of rolling combinations to construct new points on consecutive turns[2].
2. Slotting when the opponent is restrained
Slotting is the deliberate tactic of placing an isolated, unprotected checker (a blot) directly onto a key point that you wish to secure, with the intention of covering it on your next roll[2].
Beginners are frequently terrified of leaving blots. However, top players understand that slotting is often the fastest and most efficient way to complete a 5-point or 6-point prime[2]. The secret to safe slotting lies in opponent restraint. If your opponent has a checker trapped on the bar or buried deep behind a partial prime, their ability to hit your slotted blot is severely restricted. Slotting the 5-point, 4-point, or 7-point while your opponent is neutralized exerts immense pressure, forcing them to either roll an unlikely escape number or watch helplessly as you cover the point and seal the prime[2].
3. Build from the inside out or connect from the outside in
The most effective primes usually bridge the home board and the outer board. The ideal points for a standard prime are points 4, 5, 6, 7, 8, and 9[2]. Securing the 6-point and 8-point from your opening setup gives you the foundational anchors. Adding the 7-point (the bar-point) and the 5-point (the golden point) creates a powerful 4-point structure. From there, extending downward to the 4-point and 3-point completes the full cage[2].
Priming versus blitzing: what is the difference?
Two of the most aggressive strategies in backgammon are the priming game and the blitz. While both aim to overwhelm the opponent, their tactical mechanisms and endgame objectives are completely distinct[6].
| Tactical element | Priming game | Attacking blitz |
|---|---|---|
| Primary objective | Positional blockade and total mobility restriction | Rapid closed board and immediate gammon victory |
| Checker deployment | Orderly made points in a continuous sequence | Relentless hits, often attacking loose blots repeatedly |
| Risk profile | Controlled, measured, low volatility | High risk, high reward, vulnerable to return hits |
| Cube timing | Doubles when blockade is established and market loss threatens | Doubles very early on blitz momentum |
| Checker distribution | Balanced builders across outer and home boards | Heavy concentration of attackers in home board |
An attacking blitz seeks violence. If your opponent splits their back checkers and leaves a blot, a blitzing player attacks immediately, hitting checker after checker to keep the opponent on the bar while desperately trying to close all six home board points. If the blitz succeeds, the opponent is swept off the board in a swift gammon. But if the blitz stalls and the opponent anchors, the blitzing player often finds their home board depleted and overextended.
A priming game, by contrast, is an exercise in suffocating patience[6]. You do not need to hit every opposing checker. In fact, keeping an opponent’s checkers trapped on the board behind a wall is often superior to sending them to the bar. As long as your prime stands firm, your opponent is forced to consume their own pips, wrecking their own board while you prepare a clean bear-off.
Studying structured backgammon lessons will help you identify the board states where transitioning from an early blitz into a stable priming structure yields the highest expected equity.
Mutual priming battles and the mystery of timing
What happens when both players build formidable primes simultaneously? This dynamic is known as a mutual priming game, or a prime-versus-prime battle[2].
In a prime-versus-prime duel, both sides have trapped checkers behind opposing walls. Neither side can run freely. Under these conditions, the contest is almost never decided by speed or pip count. Instead, victory is dictated by a subtle strategic concept called timing[2].
In backgammon, you are never permitted to pass your turn. If you have a legal move on the board, you are legally required to play it. In a mutual priming game, both players desperately want to maintain their blockades. However, as the turns progress, players run out of safe moves. Checkers that can move without dismantling a prime point are called “spare” checkers.
When a player runs out of spare checkers to move in their outer board or home board, disaster strikes. This catastrophe is known as “crunching.”[2]
If you are forced to break a point in your own prime because you have no other legal moves, your wall crumbles. The moment your prime cracks open, your opponent’s trapped checkers burst out into freedom. Meanwhile, your own checkers remain trapped behind the opponent’s intact prime[2].
The player with superior timing is the one whose position allows them to delay crunching the longest[2]. Having spare checkers on your midpoint, outer board, or deep in the opponent’s territory provides the spare pips needed to outlast the enemy. In prime-versus-prime play, moving slowly and having a higher pip count is often a massive advantage, allowing you to watch your opponent’s board implode while your own prime remains rock solid.
How the doubling cube interacts with priming
A completed or near-completed prime creates immense leverage with the doubling cube. Because escaping from behind a 5-point prime is difficult and escaping a 6-point prime is impossible, a player who establishes a solid blockade frequently threatens severe market loss[2].
Market loss occurs when your current position is strong enough that the opponent can still consider accepting a double, but any favorable roll on your next turn will improve your advantage so drastically that the opponent will be forced to drop.
When you hold a 5-point prime and threaten to roll the final builder that completes a full 6-point prime, your opponent faces an existential crisis. If you complete the six-point prime, your winning chances skyrocket, and the opponent can no longer justify accepting a double. Therefore, recognizing when your prime is about to become lethal is the exact moment to turn the cube. For a thorough mathematical breakdown of doubling thresholds and equity calculations, read our guide on when to double in backgammon.
Similarly, tracking the relative race distance between your armies informs whether you should maintain a prime or transition into a pure race. If you are unsure how to evaluate pip deficits under pressure, consult our detailed walkthrough on pip counting in backgammon.
Four common priming mistakes to avoid
Even competitive players frequently misplay priming structures. Avoiding these four common errors will immediately improve your game plan:
- Premature home board attacking: Do not attack deep home board points (like the 1-point or 2-point) when you should be building a continuous prime across points 4, 5, 6, 7, and 8. Deep points do not trap checkers; consecutive outer points do[2].
- Failing to leap to the edge: When trapped behind an opponent’s prime, do not shuffle checkers idly in your home board. Fight with everything you have to get at least one checker to the edge of the opponent’s prime, unlocking your 11 escape rolls[4].
- Over-slotting without protection: Slotting is a powerful tool, but slotting when your opponent holds multiple mobile checkers in your outfield is reckless gambling. Only slot when the opponent’s hitting numbers are severely restricted[2].
- Ignoring timing in prime-versus-prime battles: If you realize you are engaged in a mutual priming contest, stop racing. Do not clear spare checkers unnecessarily. Preserve every single spare pip move so that your opponent crunches first[2].
Questions people ask about priming games
Can a checker jump over a six-point prime if you roll double sixes?
No. In backgammon, a six-point prime cannot be jumped by any roll, including double sixes[1]. Movement rules dictate that a roll of double sixes consists of four individual 6-pip moves. Because a checker trapped on the 1-point cannot land on points 2, 3, 4, 5, 6, or 7 (all of which are blocked by the 6-prime), it cannot execute even the first 6-pip segment of the move. It must remain stationary until a point in the prime is vacated.
What is the best point to secure first when building a prime?
The 5-point (commonly known as the “golden point”) and the 7-point (the bar-point) are the two most valuable structural anchors in backgammon[2]. Securing the 5-point and 7-point establishes immediate connectivity between your home board and your outer board, providing the core framework from which a full prime can expand in either direction. For guidance on opening moves that target these points, review our analysis of backgammon opening rolls.
How many dice rolls contain a six?
Out of the 36 possible outcomes when rolling two six-sided dice, exactly 11 outcomes contain at least one 6[5]. This gives an escape probability of approximately 30.6% (or roughly 31%) when sitting directly on the edge of a five-point prime[2].
When should you break a prime?
You should only dismantle a prime when your back checkers have safely escaped and you are ready to begin bearing off, or when forced to do so due to running out of legal moves (crunching)[2]. Voluntarily opening a prime while an opponent remains trapped behind it gives away your greatest positional asset.
Sources
- Wikipedia contributors. (2026). Backgammon. Wikipedia, The Free Encyclopedia.
- Magriel, P. (1976). Backgammon. Quadrangle/The New York Times Book Co.
- Boardgammon. “Backgammon Rules: How to Play and Board Setup.”
- Robertie, B. (2002). Backgammon for Serious Players. Cardoza Publishing.
- Our own calculations for two fair six-sided dice.
- Boardgammon. “Backgammon Strategy: Fundamentals & Winning Game Plans.”
- Boardgammon. “Learn Backgammon Step by Step.”
Found a mistake or an odd phrase? Tell us