What a back-rank mate looks like
In chess, few experiences are more jarring than playing thirty careful moves, building a commanding material advantage, and suddenly losing the game in a single turn. That sudden defeat is almost always delivered by a back-rank mate.
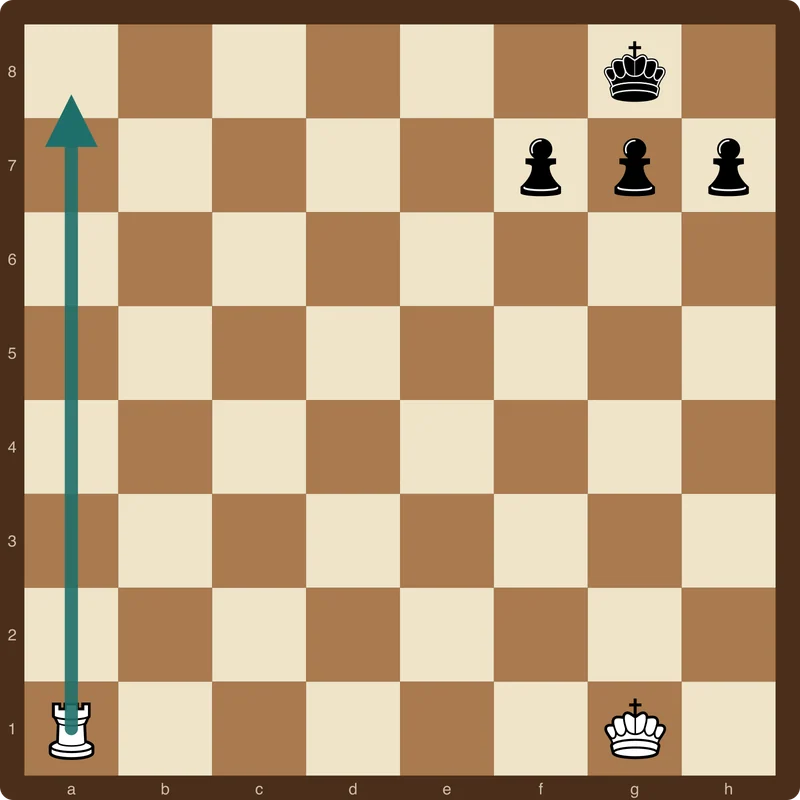
A back-rank mate occurs when a rook or queen invades the opponent’s first or eighth rank to deliver check, and the defending king cannot escape because its flight squares are blocked by its own pieces or pawns [1].
The vulnerability arises naturally from standard opening play. Castling is one of the first defensive techniques players learn because it tucks the king safely into the corner behind a protective barrier of pawns—usually on the f-, g-, and h-files. For much of the middlegame, that wall of pawns keeps the king secure from frontal attacks.
The danger begins when the open files clear. If both players trade minor pieces and rooks contest the open files, an undefended back rank becomes an open invitation. If an attacking rook reaches the eighth rank while your pawns remain unmoved on f7, g7, and h7, your king has no legal moves. The very pawn shield that protected your monarch in the opening now seals its doom.
Mastering this pattern is a cornerstone of learning basic chess tactics. Because the geometry is so simple, players who understand the threat can spot it turns in advance, both to defend their own monarch and to exploit lapses in their opponent’s camp.
Why players fall into the trap
Beginners and club players frequently succumb to back-rank mates not because they fail to see the opposing rook, but because they suffer from tunnel vision during attacking sequences.
When you are hunting your opponent’s pieces or calculating complex tactical combinations in the center, it is easy to assume your own king is safe. After all, the king is resting quietly on g8 behind three pawns. Unless you actively evaluate the integrity of your back rank, an unexpected check can shatter your position instantly.
A second common cause is the illusion of defense. A player might notice that their own rook sits on the back rank and assume the rank is adequately covered. However, tactical motifs such as deflection or overload frequently undermine that defense. If your opponent sacrifices a queen or bishop to distract your defending rook away from the back rank, the invading rook delivers checkmate behind it.
How to stop a back-rank mate
Preventing a back-rank disaster does not require keeping all your pieces glued to the first rank. Experienced players employ three proactive techniques to neutralize the threat before it develops.
1. Creating an escape square (luft)
The most reliable preventative measure is giving your king breathing room. In chess terminology, this is called creating luft, from the German word for air [2].
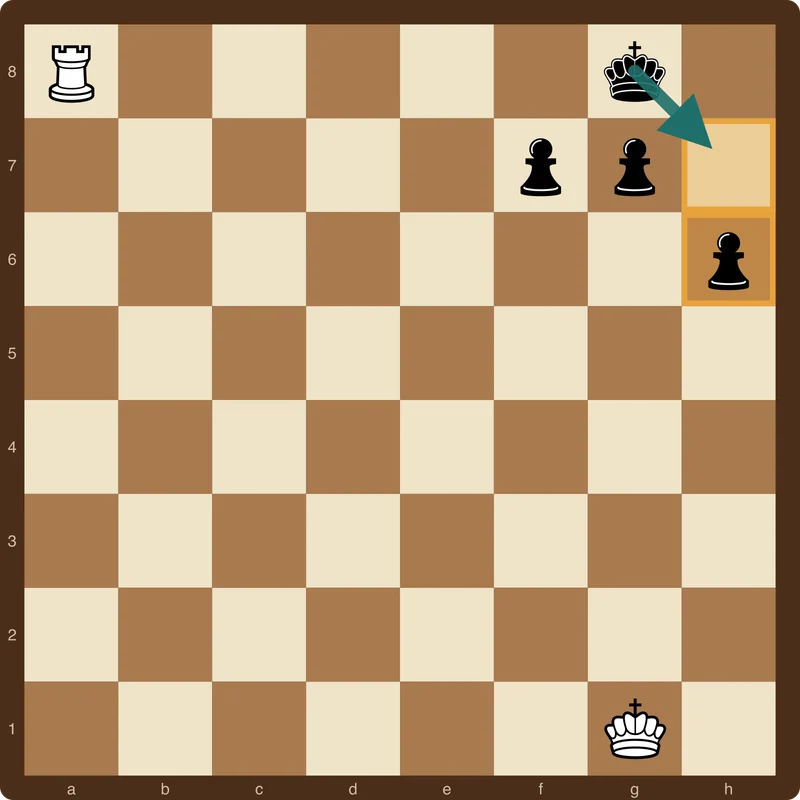
By nudging one of the pawns in front of your castled king forward one square—most commonly advancing the h-pawn to h6 (or h3 for White)—you create a permanent exit square. If an enemy rook penetrates to the back rank and delivers check, your king simply steps forward to h7, escaping danger completely.
Choosing which pawn to push requires positional awareness:
- Pushing the h-pawn to h6 or h3 is usually the safest choice because it creates an escape path without weakening the center of your shelter. It also restricts opposing knights or bishops from landing on the g5 square.
- Pushing the g-pawn to g6 or g3 creates an escape square on g7 or g2, but it introduces dark-square or light-square weaknesses around your king that an opponent might later exploit with a fianchettoed bishop.
- Pushing the f-pawn is rarely recommended solely for luft, as opening the diagonal toward the king often exposes your monarch to dangerous pin tactics.
Timing is critical. You do not need to create an escape square on move five; in the opening, your priority is development and sound chess opening principles. But as soon as the center opens and heavy pieces begin roaming the board, taking a single tempo to give your king air is an investment that prevents catastrophe.
2. Guarding the entry points
When creating luft is inconvenient or would slow down a decisive offensive operation, you can defend the back rank by controlling the open files.
Rooks enter the enemy camp along open files. If you control the open d-file or e-file with your own rooks, your opponent cannot easily slide a heavy piece down to your back rank. Furthermore, keeping a defensive piece—such as a knight on f8 or a rook on the back rank—ensures that any invading piece is simply captured upon arrival.
Always be wary of deflections. If your only back-rank defender can be lured away by an attractive capture or pinned against a higher-value target, your defense is fragile. Double-check your candidate moves to ensure your protector cannot be overloaded.
3. Maintaining active counterplay
The best defense is often a coordinated offense. If your opponent’s king also lacks an escape square, you may possess identical back-rank threats against their position. In mutual back-rank crises, the player who calculates fastest and seizes the initiative usually triumphs.
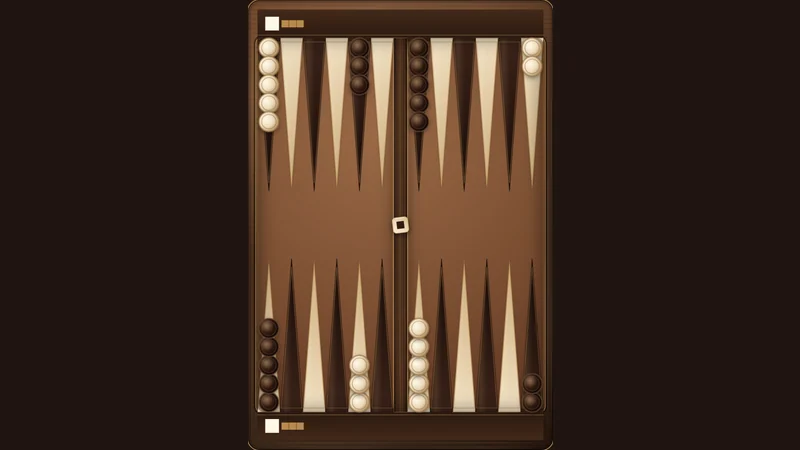
Solving tactical problems and practicing chess puzzles regularly trains your eyes to spot back-rank weaknesses instinctively. When reviewing your games on our platform or competing when you play chess online, watching for these tactical patterns will transform a common blind spot into a potent weapon in your arsenal. Much like tracking decision quality when analyzing what PR means in backgammon, tracking your tactical oversights in chess is the surest way to steady improvement.
Frequently asked questions about back-rank mates
Is every check on the back rank a checkmate?
A back-rank check is only checkmate if the king has no legal moves to escape the attack. If the defending side can capture the checking piece, interpose a defending piece between the king and the attacker, or step the king onto an open square such as h7, the check is resolved safely.
When should I create an escape square for my king?
You should consider creating an escape square when the position transitions into the late middlegame or endgame, particularly when major pieces (rooks and queens) control open files and can access your back rank. Creating an escape square too early can waste a valuable turn during the opening race for center control.
Sources
Found a mistake or an odd phrase? Tell us