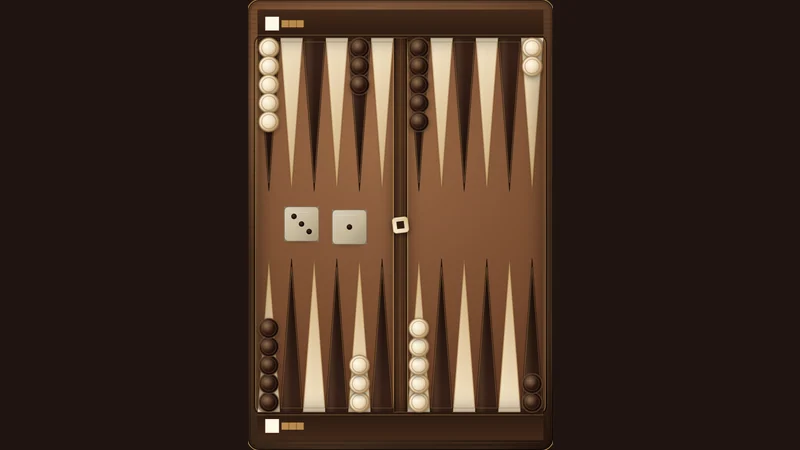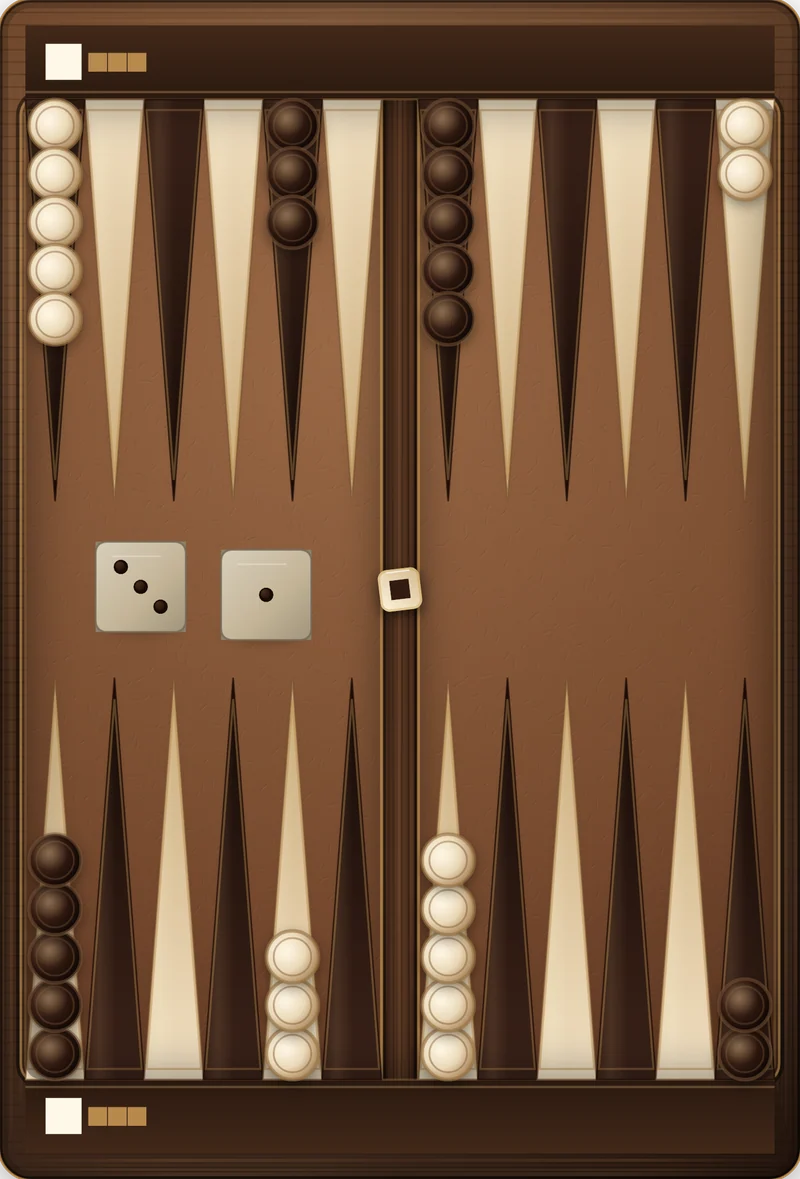

Every backgammon player eventually faces the sudden shock of a collapsed position. You split your back checkers early, took an aggressive risk to contest the outfield, and watched your opponent roll double fives to sweep the board, send two of your checkers to the roof, and establish a crushing racing lead. In casual play, many novices resign on the spot or mechanically push their remaining pieces forward in a futile attempt to run.
Tournament champions treat that exact moment as the beginning of a complex strategic puzzle. In modern theory, every competitive position belongs to one of 5 distinct game plans: the running game, the priming game, the blitz, the holding game, or the back game [1]. The secret to high-level play is not simply knowing how to attack, but recognizing when your primary plan has failed and pivoting instantly into an effective defensive structure [1].
When you are trailing, running home without contact guarantees a loss. To win, you must preserve contact, generate late hitting opportunities, and force the leader to dismantle their structure under pressure. To build the strategic foundation required to evaluate these transitions, studying basic backgammon strategy and reviewing the five backgammon game plans will help you identify when the dice demand a change in direction.
The holding game: patience on an advanced anchor
The most common and dependable way to fight from behind is the holding game [2]. A holding game arises when you trail in the race by a modest deficit of 15 to 30 pips but manage to secure a single advanced anchor high in the enemy camp [2].
The premier anchor in backgammon is the opponent’s 5-point, traditionally referred to as the 20-point from your perspective [2]. Holding the 20-point golden anchor gives your checkers commanding influence over the opponent’s entire outer board [2]. The second-best position is the 18-point, which sits directly on the opponent’s bar point [2].
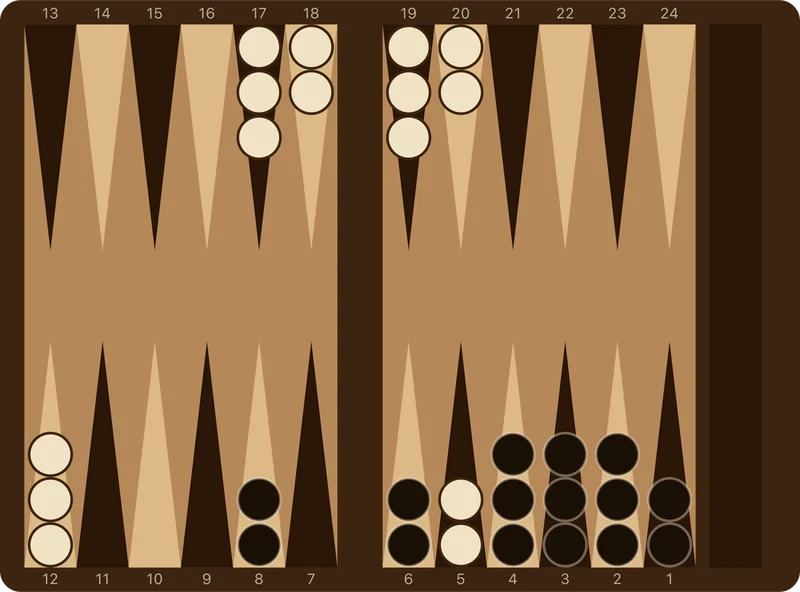
In a holding game, your objective is straightforward:
- Maintain your advanced anchor without breaking it prematurely [2].
- Bring your remaining outfield checkers safely into your home board, constructing solid points to prepare for a potential hit.
- Wait for the leader to bear in their checkers from the midpoint and outfield points [2].
Because the leader must navigate past your anchor to enter their home board, they face severe tactical constraints. When bearing in against an active 20-point anchor, the leader is forced to leave a direct or indirect shot in approximately 30 to 40 percent of game rollouts before they can safely clear their outfield [3]. If you hit that shot, the racing deficit reverses immediately, and you become the overwhelming favorite to close out the game [2].
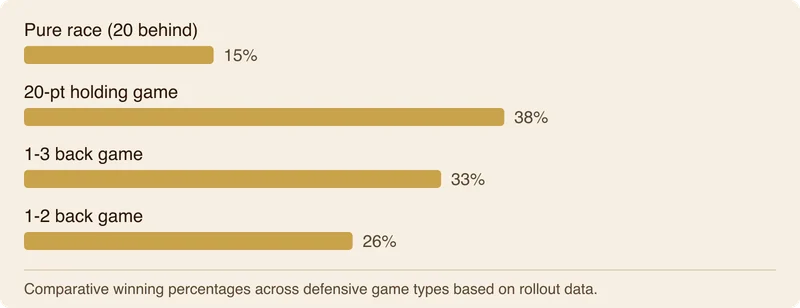
Holding games require strict psychological discipline. Beginners often panic as the leader advances and abandon their anchor too early, hoping to sneak around the board. Leaving an advanced anchor while trailing by 20 pips turns a fighting 38 percent winning chance into a hopeless 15 percent racing defeat [3]. As long as your anchor stands, your opponent cannot claim victory without surviving the dangerous gauntlet of the bear-in.
The back game: fighting from deep territory
While a holding game relies on a single advanced outpost, a back game is a far more radical, high-stakes enterprise [2]. A back game occurs when your position has suffered a total tactical catastrophe: multiple checkers have been hit and sent behind the opponent’s lines, leaving you trailing by a massive deficit of 40 to 80 or more pips [2].
Instead of trying to escape, the back game player deliberately turns this deficit into a weapon. You occupy 2 or more deep anchors inside the opponent’s home board—most commonly the 1, 2, or 3 points [2]. From these entrenched positions, you establish a double defensive base, waiting for the opponent to roll awkward numbers, break their inner points, and expose a blot late in their bear-off [2].
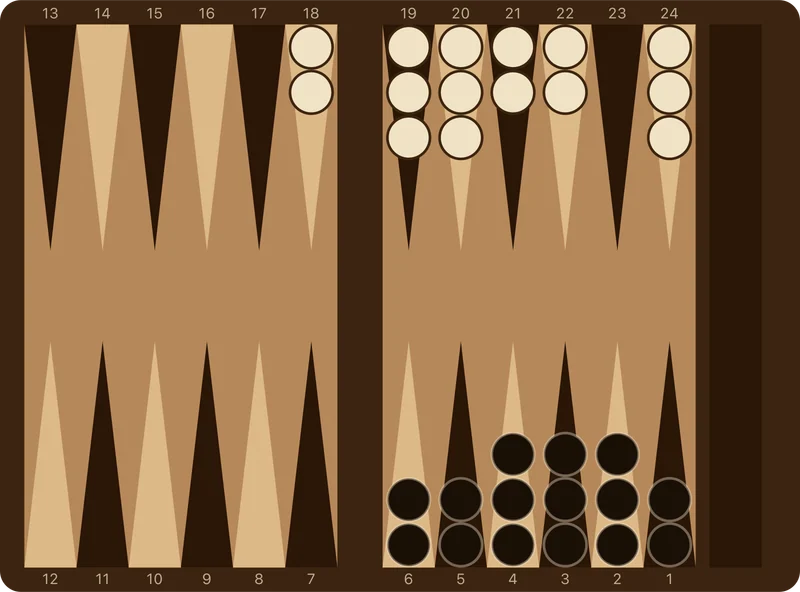
In his foundational 1995 analysis of temporal difference learning published in Communications of the ACM, computer scientist Gerald Tesauro documented how autonomous reinforcement learning systems independently discovered the validity of deep back games and holding games without human coaching [4]. The systems demonstrated that dynamic evaluation functions naturally learn to sacrifice immediate pips to secure long-term positional counterplay, validating that these defensive outposts represent fundamental mathematical truths of backgammon geometry [4].
Selecting your anchors: why the 1-3 and 2-3 dominate
Not all anchor pairings are created equal. Theoretical research and tournament experience show that the success of a back game depends entirely on which points you control [2]:
- The 1-3 back game: Widely regarded by theorists as the most formidable back game structure [2]. By controlling the 1-point and the 3-point, your anchors are separated by an open point, which maximizes the crossfire against enemy checkers attempting to clear their home board [2]. Rolls of 2, 4, and 6 from your front anchor combine with rolls from your back anchor to target nearly every landing square in the opponent’s quadrant [2].
- The 2-3 back game: Another premier combination [2]. The 2-point and 3-point anchors sit slightly higher up the board, making it easier to hit outfield blots while still providing deep defense against awkward double rolls [2].
- The 1-2 back game: Extremely deep and defensive [3]. While the 1-2 back game generates late shots during the final bear-off, its winning percentage drops to approximately 26 percent because the checkers are buried so deeply that recycling them after a hit is exceedingly difficult [3].
Holding adjacent or split points gives your pieces interlocking fields of vision. If the opponent rolls high numbers, they clear into your teeth; if they roll low numbers, they are blocked from landing smoothly.
The lifeblood of defense: understanding timing
The single most critical concept in back game strategy is timing [5]. Timing is not a measure of the clock; it is the reserve of legal, productive pips available on your forward points while you wait for the opponent to clear [5].
To win a back game, you need your opponent’s position to collapse before your own home board collapses [5]. Consider the dilemma: while your 4 or more back checkers sit idly on the 1-point and 3-point, you must play all your rolled dice with your remaining forward checkers [5].
If you lack sufficient timing:
- Your spare checkers on the outfield points run out [5].
- You are forced to push checkers onto your 3, 2, and 1 points prematurely [5].
- Your home board crunches into a useless pile of buried checkers, destroying your made points [5].
When you finally get your shot on turn twenty, hitting the blot accomplishes nothing because your home board has completely dissolved [3]. The opponent easily enters from the bar, steps over your wreckage, and marches home, handing you a humiliating gammon loss [3].
To preserve timing, skilled defenders employ deliberate counter-intuitive tactics: they avoid moving back checkers, sacrifice spare outfield blots to be hit again (recycling pips to lose more race ground), and slow down their forward movement until the opponent’s position begins to crack [5].
Building the forward prime: the trap behind the shot
Hitting an opposing blot is only half the battle. A back game cannot succeed on a hit alone; it requires an active containment net to hold the captured checker [3].
To convert a back game victory, you must construct a 4-prime, 5-prime, or full 6-prime on your own side of the board [3]. When the long-awaited shot arrives and you strike the opponent’s blot, that checker is sent to the bar. If you have established a 5-prime across your 4, 5, 6, 7, and 8 points, the opponent is paralyzed on the roof [3]. You then have ample time to untangle your deep back checkers, leap across the outfield, and bear off cleanly.
Without a strong forward prime, hitting a checker merely scatters pieces across the board, sparking a wild double-hitting scramble where the opponent’s superior racing lead usually prevails [3]. If you want to refine your prime-building technique and understand how walls of checkers restrict movement, explore our detailed guide to priming games in backgammon and practice tactical coordination in backgammon lessons.
Doubling cube dynamics: the sudden equity swing
The doubling cube behaves radically differently in holding games compared to back games [6].
In a holding game, cube decisions follow orderly boundaries [2]. When you trail by 20 pips, your opponent may double you early. Because your 20-point anchor yields roughly 38 percent winning chances, you have an easy take [3]. As examined in our breakdown of when to double in backgammon, knowing when your winning percentage comfortably clears the 25 percent take point prevents costly errors. If you subsequently hit a direct shot during the bear-in, you immediately turn the cube back to your opponent, who will often be forced to pass [6].
In a back game, volatility reaches its absolute peak [6]:
- Before the hit: The defender is a heavy underdog, facing significant gammon risks if their timing crunches. Doubling is unthinkable, and accepting an early double requires careful calculation of timing and anchor stability [6].
- After the hit: The moment the defender strikes an exposed blot and traps it behind a 4-prime or 5-prime, equity swings violently from negative territory to over 75 percent winning chances [6]. At this exact instant, the defender must redouble immediately to cash the game or claim market loss [6].
Understanding this extreme volatility allows tournament players to wield the doubling cube with lethal precision. For players interested in mathematical risk, reviewing is backgammon luck or skill illustrates how match lengths reward strategic cube ownership over short-term dice fluctuations. To test these defensive structures in practice against human opponents, you can play backgammon online directly in your browser.
How to defeat a back game: the attacker’s playbook
If you find yourself on the opposing side of the table facing an opponent who has hunkered down into a 1-3 or 2-3 back game, you must adapt your game plan to deny them counterplay [2]:
- Do not hit unnecessary checkers: The most common blunder made by beginners is continuing to hit opposing blots in the outfield. Every checker you send to the bar adds pips to the defender’s count, repairing their broken timing and keeping their forward board alive. Starve them of timing by letting their spare checkers run forward [2].
- Clear your highest outer points first: Clear your midpoint and your 8-point as early as possible [2]. Retaining tall stacks on deep outfield points makes you vulnerable to awkward dice rolls later. Bring your checkers down safely into your home board before stripping your inner points [2].
- Roll your prime forward: If you have established a prime, walk it forward point by point toward your home board, constricting the defender’s landing squares until they are forced to crunch their own structure [1].
- Dump spare pips safely: When rolling low numbers, place checkers onto your made home points rather than leaving open blots in the line of fire.
By starving the defender’s timing and clearing your outer assets systematically, you force their home board to collapse, turning their dangerous ambush into a toothless concession.
Questions people ask
When should you abandon a holding game anchor?
You should only abandon an advanced holding anchor when you roll a large double that allows you to safely disengage into an even race, or when your forward timing has completely evaporated and staying would force you to destroy your own inner board. As long as you have spare moves in your outfield or home board, keep the anchor intact.
Can you play a back game with only one anchor?
No. Holding a single deep point inside the opponent’s home board (such as the 1-point or 2-point) is not a back game; it is a deep holding game. A single deep anchor generates far too few hitting shots (usually less than 15 percent) and results in frequent gammon losses. A genuine back game requires at least two deep anchors to create overlapping crossfire.
What is the ideal pip deficit for a back game?
A successful back game generally requires a deficit of 40 to 80 pips. If your deficit is smaller than 40 pips, your forward checkers will move too quickly and crunch your home board before the opponent leaves a shot. If your deficit exceeds 80 pips, your checkers are so far behind that even after hitting a shot, you may still lose the race or suffer a gammon.
Why is the 20-point called the golden anchor in backgammon?
The 20-point is the opponent’s 5-point. Securing it prevents the opponent from building their own 5-point (the most crucial attacking asset on the board), provides a direct landing zone for checkers entering from the bar, and creates an advanced outpost from which you can contest outfield control and strike bearing-in checkers from five pips away.
Sources
- Boardgammon. “The Five Backgammon Game Plans — Race to Back Game.”
- Magriel, P. (1976). Backgammon. Quadrangle/The New York Times Book Co., New York.
- Robertie, B. (1991). Advanced Backgammon: Vol. 1, Positional Play. The Gammon Press.
- Tesauro, G. (1995). Temporal difference learning and TD-Gammon. Communications of the ACM, 38(3), 58–68.
- Kleinman, D. (1980). Vision Laughs at Counting: Backgammon Problems and Solutions. Self-published, Los Angeles.
- Boardgammon. “Doubling Cube Strategy — Take Points & Match Equity.”
- Boardgammon. “Backgammon Strategy: Fundamentals and Advanced Play.”
- Boardgammon. “Learn Backgammon: Guides, Rules, and Strategy.”
Found a mistake or an odd phrase? Tell us